Strawberry Rosé Sangria

I've been feeling all the summer vibes here in Charleston lately. There are always sidewalk sales, trips to the beach, and visitors to entertain.

And if those don't remind you its summer, you've always got the humidity that makes you regret any and all attempts to look nice.

If you follow on Snapchat (HomeSweetRuby) and Instagram you know we've been playing tourist this week, with quite an unforgettable trip to an oyster house last night. I'm just going to leave it at that and let this Instagram photo do the talking... finest parenting moment yet!

There isn't a whole lot you can do to stay cool here besides hibernate in the a/c, so this Rosé Sangria has been on repeat with all of our guests around to help drink it! It might be my favorite sangria yet, with my favorite rosé, sauvignon blanc, a hint of brandy, Sprite, and tons of fruit.


It's super easy to put together and perfect for the Fourth of July. Also I'm slightly obsessed with these acrylic glasses, safe in the wake of a wild toddler!

Expert Sangria Drinker tip: f you're hoping to keep it cold for a party, add frozen strawberries and rosé ice cubes so it doesn't get watered down!


Rosé Sangria

1 bottle of your favorite Rosé
1 bottle of your favorite Sauvignon Blanc
1/3 cup Brandy
1 container of Strawberries
1 Orange
1 Lemon

Combine the fruit, brandy, and both wines in a pitcher. Let this sit for at least an hour. (It will seem really strong as this point, don't freak out!)

When ready to serve, add as much Sprite as you like. This will make it a little bubbly and take away some of that kick from the brandy.

That's it! So easy and perfect for your Fourth of July picnic or hot summer days!


Linking up with Natalie + Annie!
10

5 Tips for Documenting Baby's First Year

Here we are, 16 months into my child's life and I've just now managed to finish his baby book.

Initially I started filling out his first baby book but in my sleepless haze during those newborn months it was not my prettiest handwriting and some of it didn't even make sense! What can I say, I'm a perfectionist.

So for the next year I kept adding milestones and fun anecdotes to the Notes app on my phone.

Now I'm not tech savvy, but I'm pretty sure that's not the safest place for all of your offspring's most precious memories.

So now that I can officially say I finished Rowan's Mushybooks baby book, I wanted to share a few tips I learned along the way for new mamas or those who are maybe a little bit (okay I was a lot) behind!


1. Pick a book you love.

I didn't love some of the cheesy prompts in Rowan's first baby book and I honestly think that is one of the things that kept me from filling it out. So before you decide, look for a baby book with a similar aesthetic to yours, fun but not annoying prompts, and a place to hold special items.


I love the simplicity of Rowan's 'Dreamcatcher' Mushybook. There are a lot of different options (see them here!) but the 'Dreamcatcher' is gender neutral, has the sweetest prompts, and clean lines. It also has an envelope in the back where I keep his hospital bracelets, birth announcement, first hat, and the name card that was in his hospital bassinet.

I also love that Mushybooks offers additional pages for your baby shower, baptism, and even toddler pages to add to your book.  

2. Print high quality photos

This is one case where I'm really glad I filled out the baby book all at once and later on, because I had so many photos to choose from and plan out for all of the spots in the book. I highly recommend making a list of all of the photos you need for the baby book, printing them, and planning out where you want them before attaching any.

I love the look of square photos and I couldn't be happier with Social Print Studio photos! The prints are thick, beautiful, and the turnaround was really quick. I used a combination of their 4x4" squares and minisquares. Social Print Studio also has a photostrip option which I think could be really fun for baby books!

Prints c/o Social Print Studio


3.  Use the Right Tools

One of my biggest pet peeves is when my pens bleed through on my planner, so I was bound and determined to make sure that didn't happen. I highly recommend getting double-sided mounting stickers for whichever book you decide on and a Micron 03 pen. I used it on the test paper that came with the Mushybook to make sure it didn't bleed through and it writes very easily.


4. Take Your Time

There are so many memories to record in a baby book, it can be a little overwhelming to write them all down at once. Personally I rushed through some of the sections in R's first book and wasn't very happy with what I wrote.

Instead of filling in the baby book immediately, I suggest taking notes either in a notebook or on your phone and then writing everything at once at the end of the month, or every 3 months.


5. Bring the Book to the Hospital

Odds are you won't be filling out the baby book while at the hospital, but it is so much easier to ask the nurses for help with hand and foot prints! They have to do prints anyway, so have the page flagged and ready for them.

If you are redoing a baby book like I did, I suggest making a copy of the original prints on card stock and sticking them in the new book. I saved the original prints in the back pocket of the Mushybook.


I'm so glad I have Rowan's baby book done, even if it took me this long! I still plan on making photo album for each year (I've got to do something with the thousands of photos I've snapped!) but there is something really special about having a dedicated baby book to write all of our favorite memories from his first year.

Thank you to Mushybooks for providing a discount for the purposes of this post and to Social Print Studio for the beautiful prints! As always, my thoughts and opinions are my own. Thank you for supporting the brands that make Home Sweet Ruby possible!
4

Taking Care of Self

Last week I attempted what I can easily say is the most strict diet and workout regimen I've ever been on.

And technically, I failed.

After feeling increasingly bad about myself over the course of the last few months I needed something to kick my self into gear.

Probably the biggest eye opener for me was how quickly you can pack on the pounds after weaning from breastfeeding if you don't also adjust your eating habits. Towards the end of my breastfeeding journey with R I was only nursing once a day but I had no idea how many calories I was still burning at that point.

Fast forward 4 months and it finally hit me that I've been focusing so much on my son, that my health, self confidence, and appearance had gone downhill. As a mama, its so easy to fall into this kind of rut.

So I decided to try the Tone it Up 7 Day Slimdown.

To summarize in the briefest way possible: you drastically cut carbs (this was a major problem or me pre-slimdown), up your protein and vegetable intake, cut sugars (also a huge challenge for my sweet tooth), and put in 40-90 minutes of workouts per day.

Meal Planner (Prettier versions that I love here and here)
Believe me when I say I set my expectations low for actually following this because, real life. I mean, if there is a mom that can make it to the gym twice a day she deserves a medal.

BUT.... I was hoping it would give me a jump start that I needed to take care of myself better and for that reason I don't think it was a total failure.

What I learned:

1. I was overeating, overdoing the sweets, and severely lacking in the vegetable department. I mean honestly why did I need to eat 3 macaroons instead of one? Did I really just eat 3 pieces of toast for breakfast? Why am I finishing the pancake Rowan left behind?

2. I actually do love to workout. I have always been an athlete. I worked at our gym in college. But the physical act of getting myself to the gym these days seems impossible. There is always a sick or teething babe to tend to, toys to clean up, sleep to catch up on, or a house to clean.

3. I can totally function without carbs after breakfast. Eating a burger without a bun isn't as bad as I thought. Riced cauliflower makes me feel way less terrible after dinner.

4. Meal planning (and prep!) is key. If I don't chop up all of those vegetables when I get home from the store, all hope is lost.

I may have only lost 2 pounds and worked out 4 of 7 days, but I truly think challenging myself with something like this was such a good decision.

Am I going to go sans hamburger bun forever? Heck no! But cutting back has made a huge difference in getting rid of that heavy feeling I get at the end of the day.

And a good sweat sesh on the treadmill, rowing machine, or even at home with a Tone It Up video has been so, so good. It just takes one or two workouts to break out of my slump and realize what I've been missing.

Oh and I also plucked my eyebrows, treated myself to new makeup, and picked up some new summer clothes that make me feel good. I'm still a hot mess most days, but I do try harder now.

Congrats if you made it this far with this post. You're the best. I hope if this does anything it motivates others in a similar place to do what makes you feel good!
__

Also I would be remiss if I didn't express my sadness over the events in Florida this past weekend. My heart aches for the families and loved ones of those involved. I hate that it's become so political so I'm just going to leave it at that.
16

DIY Toddler Table

I'm happy to say we finally finished Rowan's DIY toddler table, complete with a roll of paper attached for easy coloring.

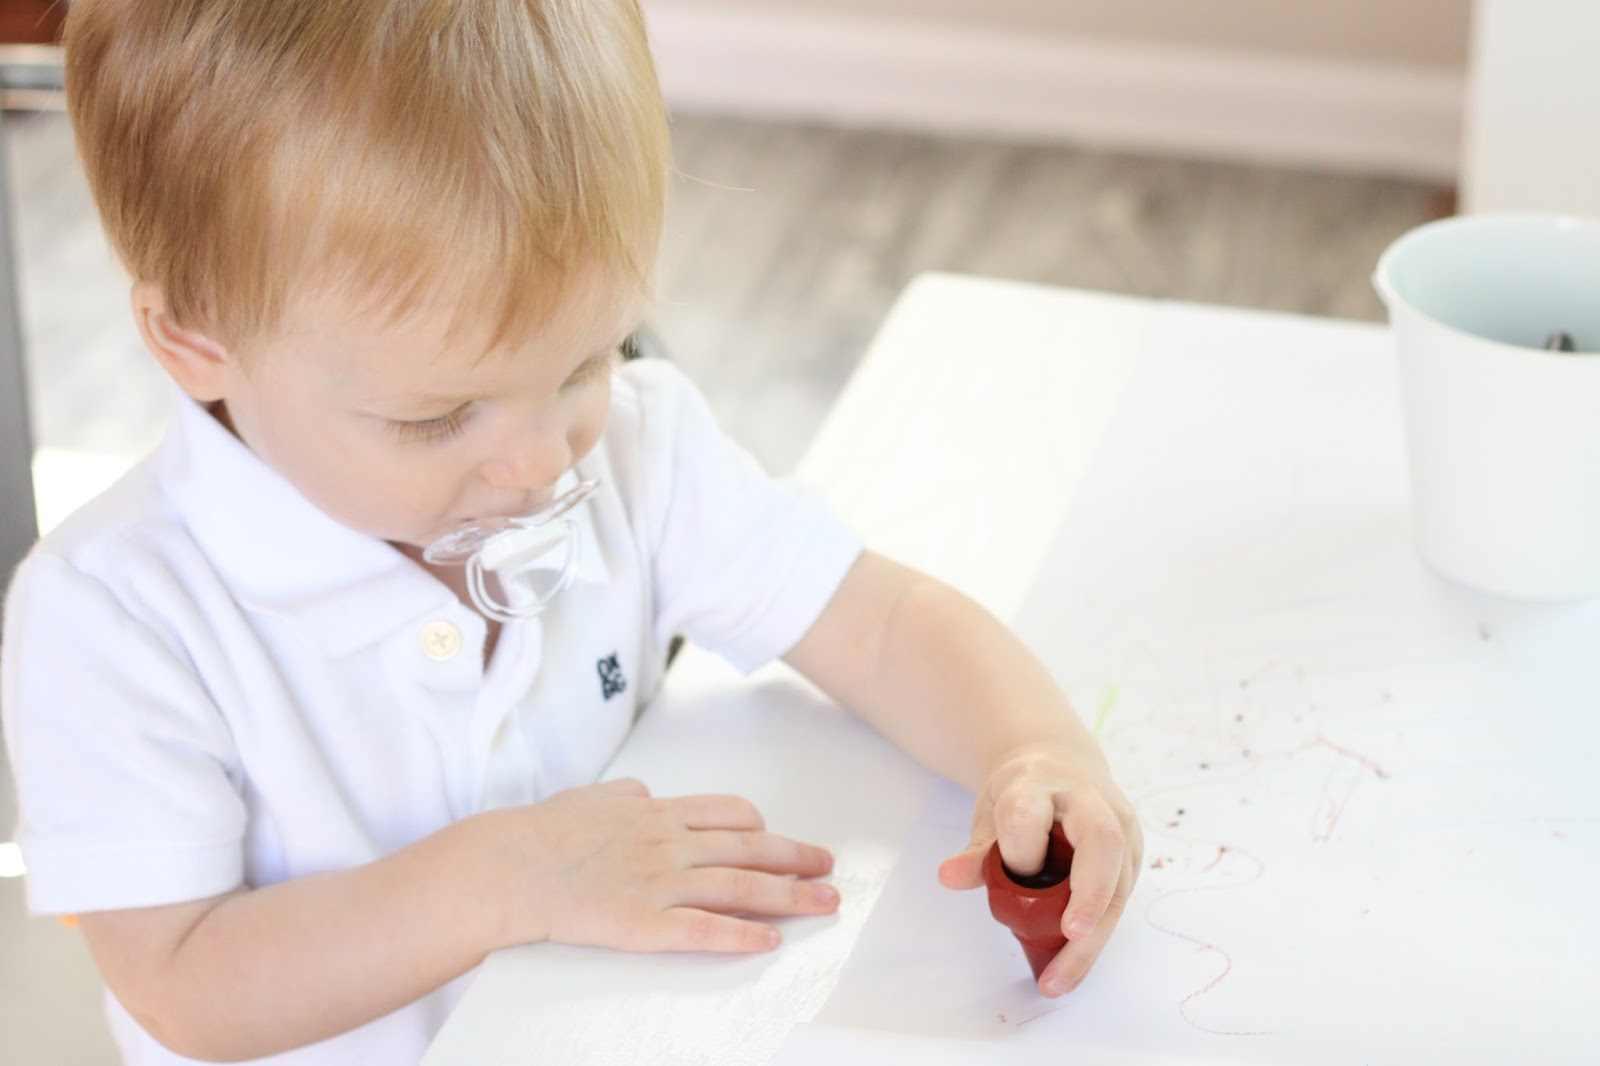
The weather was so HOT in Charleston this past weekend so we took it easy on Sunday and decided to introduce Rowan to coloring for the first time. I kept my expectations low and aside from some attempted doodles on the table, playmat and the dog, he did so good!

In the process he tested my paint job, which I'm happy to say came completely clean after a few misses on the paper!


If you've got a toddler just getting into drawing, I highly recommend these finger crayons! Rowan would have broken regular crayons for sure, but these seem pretty indestructible especially after some chewing.


This table could have easily been built and painted in a day if you have a babysitter, but we were working between nap and bed times. Honestly this project reminded me how much I dislike painting furniture these days but I pushed through with the assistance of an adult beverage after bedtime. 

I know there are a lot of readily made toddler tables out there for reasonable prices so if you don't already have the tools, I'll be completely honest with you that this project would not be worth your while.

So why did we make one? I wanted a specific size table to go with these Pillowfort chairs and to fit in his downstairs playroom, which as you can see is a little small and blocked off with a super glamorous baby gate. We also already had most of the tools and paint so it was a pretty cheap project. I think we came in around $20. It's not absolutely perfect but its level and Rowan loves it, so I'm going to call it a win!


The dimensions of our table top are 26"x20" so obviously adjust your cuts below if you're changing up the size a bit!

Materials and Tools:
3/4" Plywood (you can find smaller pieces at predetermined sizes in Lowes)
(1) 1x3x8" board
(1) 2x2x8" board
Semi-Gloss paint and primer
Wood filler
Drill
Kreg jig
1" and 1 1/4" pocket screws
Sand Paper (Highly recommend a power sander but a sanding block also works)
1 dowel road (Short versions can be found at craft stores for $2)
Paper Roll
Dowel Holders

Cut List:
(4) 2x2x20" (legs)
(2) 1x3x13 1/2" (end aprons)
(2) 1x3x20" (side aprons)
26x20" Plywood top

Our biggest problem was it can be tough to find straight 2x2" furring strips, and then the store employee cut them at uneven lengths. We immediately decided a table saw is in the cards for our next DIY project!

First, drill all of your pocket holes on the 1x3 boards. All boards should have the same pocket holes: 3-4 along the long side then flip the board over and two on each of the short ends as shown below.


Make the frame first by drilling 1 1/4" pocket screws on the short ends into all of the legs. This will require one person to hold everything in place while another uses the drill. Make sure to arrange it so the pocket holes on the long sides of the boards are facing down like in the picture above.

Once the frame is assembled, attach it to the plywood top with 1" pocket screws.


Fill in your holes with wood filler and sand once dry.

Then prime or skip straight to paint if you want to. I did one coat of primer and 2 coats of paint, sanding lightly in between coats with a sanding block.

Once your paint dries, attach the dowel holders underneath on one end.


Andddd you're done. So yeah a little time consuming but very easy and now we have a custom table and the paper is definitely the best part. Rowan has been wanting to "color" everyday after daycare this week and its been so much fun!

11

10 Things to Buy from Trader Joe's

Every couple of weekends I drive to the opposite side of the city to brave the crowds and severe lack of parking at our local Trader Joe's. I have the same "must buy" list every time, and usually stock up on 2-3 of everything. I've for sure reached hoarder status on the chocolate croissants.

If I'm flying solo or my toddler is being especially good, I let myself get sucked into the rabbit hole of interesting frozen foods, flowers, and somehow end up coming home with 3 different types of hummus?!

Anyway, a couple weeks ago my friend Maegan asked for recommendations for what to get at TJ's and though I know there are a lot of posts out there like this, I love reading them and always find something new and good to add to my list. So here are some of my tried and true Trader Joe's favorites!

Chocolate Croissants - These are super simple and so dang good, you set them on a pan uncovered overnight and bake them in the morning for like 15 minutes. They come out looking like they are straight from a bakery! I'm obsessed. The mini croissants work the same way and are also delish.

EVOO - I think this runs you about $8 which is a great deal for the size and I love the spout!

Frozen Fruits - TJ's has a great selection of frozen fruits that are perfect for smoothies. Or like in our case, you have a child who only likes fruits on certain days and the fresh ones would go bad too quick!

Riced Cauliflower - my newest obsession! I made fried "rice" out of this and its so, so good not to mention easy!

French Macarons - every.single.time.

Mini Churros - These are so fun! I burnt them the first two times I made them so its probably best to make them after the kid goes to bed. You won't want to share them anyway...

 Balsamic Glaze - Love this on salads, veggies, pizza.. pretty much everything.

Mini Meatballs - Perfect for appetizers and kids, I always have a bag of these in our freezer!


Blooms - TJ's is a basic blogger's dream during peony season but I love getting different flowers like garden roses, ranunculus, and some eucalyptus to help a small bouquet look more full.

And last but definitely not least... wine! I've gotten a lot of good wines, even the cheap Two Buck Chuck isn't that bad IMO. Not all stores carry wine because of state regulations so if you're one of those people, stock up while you're on vacation elsewhere!

My absolute favorite rosé is the J.L. Quinson Côtes de Provence Rosé but I've heard the Griffone Rosé is also good!

And not pictured because I ate them already: Sweet Potato Ribbons, Hatch Chile Mac & Cheese, Spanikopita, Edamame Hummus and Mediterranean Hummus, Mac & Cheese Bites, Blondie Bar mix, and this salad mix (a recent find now that I'm trying to go all healthy and such). If you've never had it, try the Speculoos Cookie Butter but I tend to stick to the Speculoos Cookies myself!

And because I'm super basic, you better believe I stock up on any and all pumpkin things in the Fall.

Okay now tell me your favorites! What do I need to buy in bulk on my next trip?!
13

Top 5 One-Piece Swimsuits (Tested + Approved!)

I hope you all had a fun long weekend! I've been working hard on this post for a few weeks but seeing as we're past the unofficial start of summer, I thought it was time to share my research.

You all know I've been on the hunt for a black one-piece swimsuit this year, but what you didn't know is I've been ordering them online and returning the ones that don't pass my rigorous testing.

Honestly I'm not trying to impress anyone in a swimsuit. I very clearly have "mom" stamped all over me and I'm okay with that. But I do want to feel comfortable.

As in... whats left of my post-baby boobs aren't flopping all about as I wrestle my fussy toddler in swim class.

I had a lot of requests to share some of my faves so I've broken it down into why I loved or didn't love a one-piece black swimsuit.

Clockwise: J. Crew Femme One-Piece Swimsuit, J. Crew Deep V Ruched One-Piece, Anthropologie Seaside High Neck One Piece, Target Flounce One-Piece, VS Halter Shaping One-Piece
After my extensive testing, I found a trend. Swimsuits with padding, slight ruching (but not too much), and thick straps were my favorite. Those that didn't even include cups were tossed immediately (ahem... Old Navy scallop one-piece. So cute but so not practical unless you haven't hit puberty yet).

Anthropologie Seaside High Neck One Piece (Similar, on sale!)
Pros: Good coverage, halter neckline, pretty patterns or solids
Cons: No ruching and may be better for smaller cup size.. I'm not sure it would have wrangled my nursing boobs from last summer

Target Flounce One-Piece
Pros: Side boning, padded cups, doesn't pull down when moving around, slight ruching, flutter material distracts from my post-baby pouch that is apparently here to stay, price
Cons: Strap isn't super secure, may be better for smaller cup sizes

J. Crew Deep V Ruched One-Piece
Pros: Slight ruching, strong straps, padding, lower back which makes you feel less mom-like but still covered
Cons: Price unless you get a good sale and potential back fat if straps are too tight

J. Crew Femme One-Piece Swimsuit
Pros: Wide straps, ruching, padded cups and lots of support
Cons: Ruching is a little more obvious

Victoria's Secret Halter Shaping One-Piece
Pros: Strong halter strap, ruching, lots of support
Cons: Price

Honorable mention to this Loft Seashell Cutout Swimsuit. I loved the cutout but the pattern didn't do anything for me. Clearly I love the basics!

My biggest challenge was finding budget options that fit the bill, but sales and Ebates helped!

So what's my final verdict? I'm keeping the flounce swimsuit because I already had it and the deep V ruched swimsuit, its my number one for sure!

Hope this helps if you're on the hunt for a flattering one piece, especially for my fellow black one-piece swimsuit lovers!
11
Powered by Blogger.