Showing posts with label Projects. Show all posts

One Room Challenge :: Modern Farmhouse Living Room

I've been dragging my heels on finishing our living room for SO long, its almost embarrassing. It doesn't need a major overhaul but a refresh with this thing called styling will go a long way considering how much time we spend in this room! So I thought what better time than the One Room Challenge, where I actually have to meet a deadline in 6 weeks?!  

If you're hearing from Calling it Home, welcome! I hope you stick around!

 So here are the before photos....


Not terrible by any means but it just doesn't look finished. Here are a few of the big things I think this space needs:

- Our ceiling light doesn't work so that needs to be addressed or replaced
- Accent pillows. Lots of them
- Some kind of greenery. I have a black thumb AND a toddler so I'm totally going with a faux plant in here
- An updated gallery wall with a mix of personal photos and fine art 
- Replace the rug that somehow looks white in this photo but its actually super gross and worn out after having a dog, toddler, and husband trample on it for 2 years 
- One accent chair or two? Or just a different style?
- Floor lamp to hold us over when the ceiling light stops working
- The whole thing needs a bit of styling
 

I love to add hints of the farmhouse style but I really like it to be more of a clean and modern farmhouse look mixed with classic furniture.


So there you have it! Any thoughts for mixing classic with modern farmhouse? I don't want to go too over the top with farmhouse but I also want it to be fun and relaxed!
 
6

Guest Bedroom Reveal + Annie Selke Giveaway!

This post was sponsored by Annie Selke as part of an Influencer Activation for Influence Central and all opinions expressed in my post are my own.

I'm so excited to finally share our guest room makeover! This room has come such a long way after this post... we painted the tan walls, added beautiful white bedding with lots of texture, and hints of Charleston to make it feel welcoming for our family and friends.


While I've always loved our farmhouse metal bed and antique dresser (which was originally in Rowan's nursery here), I think I'm most excited about the bedding. Between the bright white, subtle ruffles on the duvet, and textured coverlet, the style and comfort-level is exactly what I was looking for in this room.


When I saw this ruffled duvet in the Annie Selke catalog I knew I had to have it for this room! It picks up the farmhouse style without being too frilly.

I'm still not sure if I want to put a curtain up on that awkward window or not, but this is definitely the layout that makes the most sense in this room!


The coverlet and euro shams are so soft and add some texture to the bedding. I also added DIY watercolor floral pillows, made from a cloth napkin, and added some tassels to the striped lumbar pillow which I already had.


This Anne Selke peony candle makes the room smell amazing! I don't think I've ever had a candle make the whole room smell this good without lighting it.


I love this room so much, I can't help spending time in it now! The light is amazing and with the white bedding its the brightest room in our house. And thankfully we finished just in time for a visit from Grandma while we head to Hawaii!


If you're looking for new bedding, I highly recommend the Annie Selke brand. You've probably already heard about Dash & Albert, but Annie Selke's other companies like Pine Cone Hill are some of the top brands for bedding and home decor.

Though the price is on the higher end, its so worth it for the quality! Plus if you sign up for the Annie Selke email newsletter here you can get 15% off of your first order!

Or enter below to enter for a chance to win one of 3 Annie Selke gift cards, each valued at $500! You have until October 25th to enter, good luck friends!

Annie Selke Giveaway
10

Modern Farmhouse Dining Room Inspiration

Almost two years into home ownership, and 5ish years since we started to rid our home of hand-me-down college furniture, I feel like I'm finally getting a grip on a decorating style that works for us.

I love the farmhouse trend but I have fear of commitment in the decorating department, so I think my dining room inspiration gives us a really good mix of the rustic meets classic style. Also known as Restoration Hardware.

Obviously shopping there for something other than a Christmas ornament is a no go.

But I've found some really good Restoration Hardware knockoff looks that I think will be perfect for our space, keeping it classic and beautiful but also interesting.
Sources:
Home Decorators Jacques Oval Side Chairs (Similar here, here, here, and here. I also really love these!)
 Paint Colors: Sherwin Williams Simply White and Benjamin Moore Pale Oak

Those beautiful watercolor art prints are framed and ready to be hung, you guys they are so, so gorgeous. Hand painted on canvas and definitely the nicest piece of art I'll ever own. Do yourself a favor and visit Joanna's shop, ColorWatercolor. She is so sweet and talented and there are so many beautiful floral options! I went with the cotton because it will always remind me of living here in the South.

With just the painting left to do on our dining room, I can slowly feel this room coming together. Up until now its been a garage of sorts for Rowan's numerous vehicles, strollers, and snack crumbs.

I know a formal dining room isn't for everyone, but if you've been around here long enough you know my love for holidays and entertaining runs deep so I can't wait to see the finished product!

P.S. Has anyone seen the new Magnolia Home rugs? All the heart eyes!! 
3

Adventures in Wainscoting

You guys, it blows my mind that its the last week of August!

We've been in crunch mode trying to rid the last few rooms of angry tan walls and progressively work on picture frame wainscoting in our dining room. I'm really hoping to get it all done so we can focus on more fun things this Fall!

But of course my mom bod thought it was high time I finally picked up one of the four thousand viruses Rowan brings back from daycare, which left me in bed all day Saturday.

By 4 PM I finally decided to shower. I was a hot mess but thankfully my husband held down the fort.

We finally got to work on attaching the trim Sunday night, but the couch and Night Of finale were calling our names so this is what we've got! I can't wait to show you the finished product!

"Before"
Thankfully we borrowed a friend's miter saw, brad nailer and compressor. (Soon he's definitely going to tell us to take a hike and buy our own shit). But they are major time savers in this project and obviously we need as much of that as we can get working only during nap times and after bedtime.

Right now all forty thousand pieces of trim have been cut and we started attaching it with glue before going back over it with the nailer.


It looks a little rough, but don't worry... all of those gaps will be filled with caulk and a nice coat of paint will spruce it right up!

I think it already makes the room look more finished even though that is clearly not the case. And to think we were quoted over a thousand bucks for this project from a pro!

Who knew the hardest part would be picking a paint color for the top half?!
5

DIY Upholstered Headboard with Nailhead Trim [Update!]

Last week I was looking through old posts (something I should never do because, yikes the photography was atrocious!) and I thought it was high time I updated one of my most popular posts, our DIY upholstered headboard!


I'm happy to say that after almost three years, this headboard is still one of my favorite pieces of furniture in our house! And given our DIY inexperience at the time, it's both a shocking and proud moment that it still looks just as good.

I still remember my perfectionist self fighting with this fabric, especially getting it over the curved edges without lumps and bumps, so consider yourself warned if you go with this shape and/or a velvet-like fabric! 
 

What you need for Queen-sized headboard:

1 (23/32 x 4 x 8) piece of Plywood, uncut
1 (1 x 6 x 12) piece of lumber, cut in half
Staple Gun
1 pack of 3/8" (10mm) Staples
Hi-Loft Batting in Twin Size (Found at craft stores)
Twin Foam Mattress Pad (Found mine at Walmart)
1 (50-pack) of 1 1/4" Wood Screws
Spray Adhesive
Nailhead Trim (Also found at craft stores)
Rubber Mallet (I randomly found this in my car's emergency kit, also found at craft stores)
Jigsaw (This doesn't have to be fancy, we use this one)
Fabric (I used one Ikea curtain panel)

Total Cost: $110

For step-by-step (but ugly) photos, see original post!

First cut the plywood down to size. The most common questions I get about this tutorial are about the dimensions, so I hope this poorly done diagram helps!


Next, sketch out the shape. I used a paper bag to make a stencil then traced the left side, flipped the stencil over, and stenciled the right.

Line up your 1x6 boards on each side of the plywood, starting at the top (you'll need that jigsaw to cut the same shape as the plywood), and cut the bottom to your desired height. The legs of our headboard are 21" from the bottom of the headboard.

With your leftover plywood from the bulk of your headboard, cut the same shape to reinforce the top and the legs. That part was tricky for us because the leftover plywood wasn't the length of the headboard. We ended up having to piece it together and even though there are a few tiny gaps, those won't matter in the long run.

Attach the legs and the frame pieces to the plywood with the wood screws, about every 6-8 inches.

Now the fun part, upholstering!


Cut your foam padding to fit within the frame you just completed. Spray the plywood with adhesive and stick the foam to the board.

Next put the batting underneath (on the front side of your headboard) and get to stapling. You should know I went super crazy with the staple gun and you probably don't need to use as many as I did!

Before moving on, trim all of the excess batting.

Once you get to the actual fabric, it's basically the same process as the batting. If you can find an assistant, it helps to have one person pulling the fabric while the other does the stapling to keep everything taught.

Save the curves and most of the top of the headboard for last.

It helps to cut the fabric in 'V' shapes in the curved portions to minimize puckering. My fabric refused to cooperate and I almost cut it too far but luckily you never see the back of this thing!

Upholster the legs in the same way you did the top half.

Applying the nailhead trim was actually easier than I imagined. You only have to nail every 5th nail into the wood and its flexible enough that you can bend it however you need it for the curved portions. The trick is keeping it straight, so I used my leveler because it was the perfect width from the edge of the headboard. Once I got into a rhythm, this part only took about 20 minutes!


I love how you can still see the nailhead trim and headboard fabric all the way down the sides of the mattress (which you can see in the photo above). A lot of store-bought headboards stop at the top of the mattress and you can see the metal brackets, so a little extra effort here goes a long way in my opinion!

So there you have it, a prettier version of my DIY headboard! Let me know if you have questions, I hope this new diagram was helpful! 

Now I just need to get some artwork and pillows for this space. If you have a favorite shop for pillows please share!
7

DIY Toddler Table

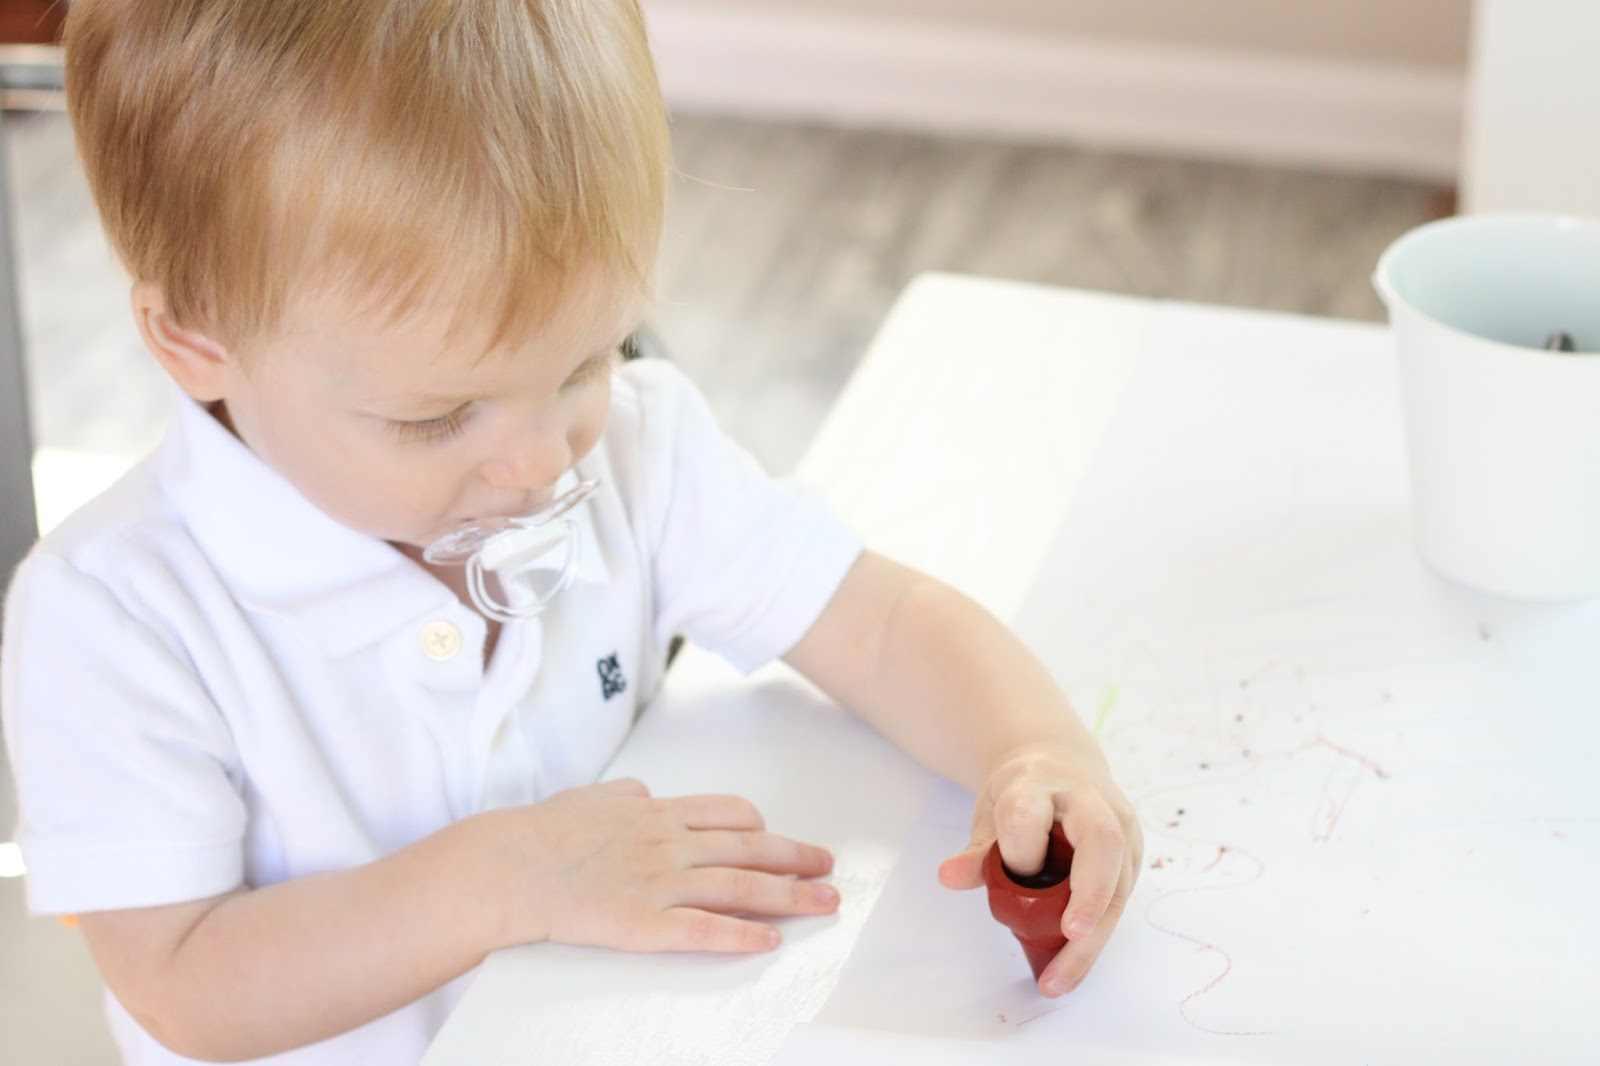
I'm happy to say we finally finished Rowan's DIY toddler table, complete with a roll of paper attached for easy coloring.

The weather was so HOT in Charleston this past weekend so we took it easy on Sunday and decided to introduce Rowan to coloring for the first time. I kept my expectations low and aside from some attempted doodles on the table, playmat and the dog, he did so good!

In the process he tested my paint job, which I'm happy to say came completely clean after a few misses on the paper!


If you've got a toddler just getting into drawing, I highly recommend these finger crayons! Rowan would have broken regular crayons for sure, but these seem pretty indestructible especially after some chewing.


This table could have easily been built and painted in a day if you have a babysitter, but we were working between nap and bed times. Honestly this project reminded me how much I dislike painting furniture these days but I pushed through with the assistance of an adult beverage after bedtime. 

I know there are a lot of readily made toddler tables out there for reasonable prices so if you don't already have the tools, I'll be completely honest with you that this project would not be worth your while.

So why did we make one? I wanted a specific size table to go with these Pillowfort chairs and to fit in his downstairs playroom, which as you can see is a little small and blocked off with a super glamorous baby gate. We also already had most of the tools and paint so it was a pretty cheap project. I think we came in around $20. It's not absolutely perfect but its level and Rowan loves it, so I'm going to call it a win!


The dimensions of our table top are 26"x20" so obviously adjust your cuts below if you're changing up the size a bit!

Materials and Tools:
3/4" Plywood (you can find smaller pieces at predetermined sizes in Lowes)
(1) 1x3x8" board
(1) 2x2x8" board
Semi-Gloss paint and primer
Wood filler
Drill
Kreg jig
1" and 1 1/4" pocket screws
Sand Paper (Highly recommend a power sander but a sanding block also works)
1 dowel road (Short versions can be found at craft stores for $2)
Paper Roll
Dowel Holders

Cut List:
(4) 2x2x20" (legs)
(2) 1x3x13 1/2" (end aprons)
(2) 1x3x20" (side aprons)
26x20" Plywood top

Our biggest problem was it can be tough to find straight 2x2" furring strips, and then the store employee cut them at uneven lengths. We immediately decided a table saw is in the cards for our next DIY project!

First, drill all of your pocket holes on the 1x3 boards. All boards should have the same pocket holes: 3-4 along the long side then flip the board over and two on each of the short ends as shown below.


Make the frame first by drilling 1 1/4" pocket screws on the short ends into all of the legs. This will require one person to hold everything in place while another uses the drill. Make sure to arrange it so the pocket holes on the long sides of the boards are facing down like in the picture above.

Once the frame is assembled, attach it to the plywood top with 1" pocket screws.


Fill in your holes with wood filler and sand once dry.

Then prime or skip straight to paint if you want to. I did one coat of primer and 2 coats of paint, sanding lightly in between coats with a sanding block.

Once your paint dries, attach the dowel holders underneath on one end.


Andddd you're done. So yeah a little time consuming but very easy and now we have a custom table and the paper is definitely the best part. Rowan has been wanting to "color" everyday after daycare this week and its been so much fun!

11

One Room Challenge :: Playroom Makeover with Built-Ins

Today I'm introducing you to our hot mess of a playroom.

Behold, in all of its unkept, bland glory.


When we moved in to this house I knew this space was going to get some use as it poses significantly less danger for my wild and crazy toddler than the wood floors, steps, and nicer quality furniture in our downstairs living space.

But its really freaking boring and there is zero lighting in this room at night. Which means after putting Rowan to bed I trip over and step on the loudest toys ever on my way to the steps.

Since we don't have enough spaces in the house I want to redo (you know... that series I mentioned and haven't touched yet), I'm adding this one to the top of the priority list! Every week for 6 weeks I will be sharing progress of our playroom makeover by joining tons of other creative bloggers in the One Room Challenge hosted by Calling It Home. So fun, right?!

As with every DIY project we do, we'll take our low budget and beginner DIY skills and hope for the best!

So here is the plan:

DIY Built-in Window Seat with bookshelves - I've clearly lost my mind because we've never done anything like this before, but here in my inspiration. I doubt we'll do cabinets, just all open shelving so I can throw a basket or two in there.

The cutest toddler chairs and table 

DIY Growth Chart like this  

Add a light

Add some color with these adorable Minted alphabet and number prints, and a fun banner

Add a chalkboard, art supplies station like this 

Ditch the ugly couch (we'll replace it eventually but we really don't sit on it much right now)

I'm not even sure if all of this will fit in the space, so if anything the chalkboard area can be ditched because Rowan is only 1 and will eat any and all chalk. 

Here is a peek at my horrible drawing skills.


If the built-in shelving and crown molding trim goes well, we think it would add so much value to the house and help majorly in the organization department. The kicker is, we play in this space every day after work so keeping it kid friendly while in construction is going to be rough. Because you know, we move at a snails pace around here!

We've got a contractor friend on speed dial for advice and I'll be sure to share all of the highs and lows with you along the way.

If anyone has completed a built-in project like this before please share any insight you've got. We'll need all the help/motivation/wine we can get!

See more of the vision for the playroom here and the DIY projects we'll be using as a guide here.

And in case you're interested, scroll through some of my favorite projects we've done so far here
9

DIY :: Square Photo Display

If you've been around here long enough, you know I'm a sucker for an easy DIY project. I don't have a lot of time for them lately, but I've had tons of requests for a tutorial for this photo display from Rowan's first birthday party and I figured it was time to share.

I loved this photo display because it was a little different than what you see at most parties, it can be used for any of your photos (thinking Instagram photos would be so fun!), and I could glam it up with a little eucalyptus garland.

I have to share a little secret though...

I made it harder than it should have been.

So this is one of those "do as I say, not as I do" posts.


What you'll need:
Dowel Rod
Thread or some sort of thin rope
Square photos
Tape (regular or washi tape)

Determine how long you want your dowel rod to be and cut to size. Craft stores have them at varying lengths but mine was from Lowes and needed cut.

Lay out your photos and decide how you want them to be arranged.

Cut rope or thread for each of the columns and the top portion that will be used to hang your display. Tie these to your dowel rod.


Here's where I screwed up... I used hot glue to attach the photos. Like a dummy the tape never occurred to me and let me tell you, washi tape is way easier. I added some to the backs just to give you a visual.


If you want to add a garland like I did, just cut a bunch of stems and attach them with floral wire or the same thread you used if its not noticeable.


If you're a stickler with details you may end up having to hot glue a few stubborn leaves to the garland. My mom thought I was crazy doing this but I'm such a perfectionist.

And that, my friends, is all there is to it! If you end up making this be sure to email me or tag me on your photos, I'd love to see the finished products!
7

DIY Restoration Hardware Knockoff Coffee Table

This post could also be titled: The weekend that it never stopped raining.

Y'all, it's been relentless. We had almost 3 feet of rain over the course of 4 days. And it's still going.

Though our backyard did flood some, we were extremely lucky that we were spared for what most of the Low Country experienced. It's heartbreaking to see the photos of downtown Charleston.

Most of the roads and bridges around us were shut down and curfews were ordered, so we have basically been cooped up in our home since Thursday. Needless to say we were feeling really stir crazy but are SO incredibly thankful that our little family, our home, and ours friends are all safe.

And if there is a silver lining, its that we got a full weekend of cuddling, football watching, and wine drinking under cozy blankets.

Since I'm pretty sure y'all don't want to see photos of us in our pajamas all weekend, I thought I'd share our DIY coffee table!


Its finally done. Hallelujah! (Although in these photos we hadn't applied the clear coat yet... sorry, had to work with whatever light I could get for some photos!)

We have been working on this table for months. Yes, you heard me. MONTHS.

And no, it should not take that long.

But when you're husband is working on it during nap times and you change the dimensions on him after its mostly built (sorry babe!), it turns into a multi-weekend event.


I love the Restoration Hardware Balustrade coffee table, but at a $1,700 price point, that was absolutely out of the question.

I'm not going to do a full DIY post because everything is laid out perfectly by Jen from the House of Wood. But I want to share some of the changes we made to make it work with our space!


Size

The original plans for this coffee table are huge. I mean this thing would have taken up our entire living room and it just wasn't practical for us. So we cut down and removed some boards and I'm so happy we did. Our table comes in at 44" W x 27.5" D.

Stain

I wanted a lighter colored stain that had just a slight hint of grey in it, so after testing quite a few combinations I decided on a coat of Minwax Special Walnut then layered a coat of Minwax Classic Grey over top. I wiped the grey off immediately because it can look blue if its on there too long.

For whatever reason, some parts of our boards did not stain evenly. The ends are always darker but it does drive me a little bit crazy the way it stained (and don't get me started on how the wall color clashes with the couch color). Not much we can do though since we were trying to keep this cheap and bought lower grade wood.

Cost

The most expensive part of this project is purchasing the pillars. Those run a minimum of $112 for 4, depending on the wood you choose.

And as a result of my last minute changes in size to the already-built coffee table (insert my husband's eye roll here), we had to buy a few extra boards.

Total cost: just under $200. 

$200 versus $1,700? Yeah, I'll take ours any day.


Major props to my husband for building this gorgeous piece for us. I'm super impressed with his woodworking skills, and I think he even surprised himself considering this is only his second piece of furniture he has built.

I only get credit for staining, motivational speeches, and the serving of beer during the building process.

We haven't owned a coffee table since college (first world problems, I know), so I'm excited to style it and put some Fall touches on it! I hope you all had a fun and dry first weekend of October!
26

DIY :: Restoration Hardware-Inspired Baby Mobile

I hope you all had a fun and festive New Years Eve! Our weekend was very laid back and yet somehow I'm still tired! Guess that comes with the territory. We did get a lot of work done on the nursery so today I wanted to share one of my favorite parts... the mobile!

I have been so incredibly picky throughout this nursery planning process that I've basically forced myself into DIY projects, and this baby mobile is one of them. And though it has been a slight pain for this perfectionist to balance this thing, I'm so happy with the way it turned out!


Initially I had my eye on Restoration Hardware's Wool Felt Night Sky Mobile, and though it was a reasonable price, tacking on shipping for something I felt like I could make myself put it over budget.

Then I remembered a friend of mine who made a wool felted bear mobile for her sweet little babe's nursery (see the amazing tutorial here, she is seriously SO talented!) and it gave me the idea to go with the wool felted stars. I ended up ordering the stars from the Etsy shop Handmade Only, which specifically sells felted wool shapes that are so cute and saved me a ton of work!


What you will need:
Wool Felted Shapes (I ordered 15 stars total, but used only 13, in the colors light grey, white, and french blue)
1 Dowel Rod (the thinnest you can get, found in the wood section of craft stores)
Ceiling Hook
Extra Strength Thread + Needle
Hot Glue Gun

One. Prep the dowel rods + Plan the star placement
 
I used a box cutter to cut the dowel rod into pieces. The longest is 12" and the other 3 pieces are 6" each. Spray paint the rods if you don't want the natural wood color.

Once you've got your dowel rods cut, plan how you want the mobile to look. I added more stars after taking this photo.

Three. Thread the wool stars

Fabric swatch is there so you can see better how I tied the string
Using one long piece of thread (do not double it as if you were sewing), tie 2 or 3 knots on one end and tie the other end to your needle. The knot will keep your wool star from sliding off. Thread each star, or group of stars.

Four. Tie the thread + stars onto dowel rods

The biggest pain with this project is getting the whole thing to balance. I had the stars threaded and ready to go for weeks but kept putting off the final process of putting this thing together.

Tying your strings on the dowel rods (making sure they are roughly the same length) ended up being the easy part. Tie 3 or 4 knots to make sure the thread is secure. Once I was sure about the placement and length of the string, I trimmed the extra thread and put a tiny dot of hot glue on the knot to keep it secure.

For the long dowel rod, just tie one piece of thread to each end so it will look like a triangle when hung.

Five. Balance the mobile

After everything is tied, hang the mobile up on a nail in the wall (or something else to get it off your flat surface) and start to balance it. The dowel rods will tilt if its not balanced, so its just a process of shifting the thread to the left or right, depending on which way the rod tilts. 

Six. Hang the mobile


Take a very long piece of thread, loop it through the "triangle" you made with the thread and long dowel rod, and tie the end. Attach it to a ceiling hook where you want to hang the mobile and you're done! The mobile will move on its own (and your dog may bark at it from time to time), but since we used very thin thread, it will be very delicate and won't stick out like a sore thumb in the room.


This may seem a little confusing but I swear its pretty darn easy, aside from the balancing part, so feel free to email me or comment if you have any questions!

18
Powered by Blogger.